Welcome to VR Me Up Developer Log Number 15.
Jump in and start building at https://vrmeup.io/@playbuild25.
Several months have passed since the last developer log, but significant improvements have been made to the server code that operates behind the scenes. Exciting new user construction features have also been added, which will be the main focus of this update. Those following the Twitter/X feed are aware that efforts have been made to enable easy building of structures and editing of worlds.
The goal is to soon allow you to create your own worlds, but I’ve released the construction dynamic early to gather your feedback. I’m excited to introduce the playbuild25 world at ‘vrmeup.io’ for you to explore and build; you can find the link in the description. This world is a temporary ‘free for all’ building space, intended for testing and feedback. No registration is required— simply jump in and start building. Simply find a spot and begin building and modifying the environment. Keep in mind that this is a shared world for interaction and collaborative building, so the rules are as follows:
- Play nice. Respect other players and their creations.
- Build nice. Do not create anything offensive or that interferes with other players’ constructions.
Upon entering the “playbuild25” world, users will be placed at the default spawn point. They can then explore to find an open space for building. A hammer icon will be visible in the menu bar at the bottom of the window, indicating that building is possible in that area. Pressing the hammer will open the “build bar.”
The Build Menu
Opening the “build bar” will automatically switch the user to “edit mode.” By clicking and selecting any item in the world, users will be able to move, scale, rotate, or remove the item. More details on this will follow. For now, let’s add a tree!
Using Model Palette “Build Mode”

The 9 “cube” buttons in the “build bar” serve as the “model palette,” which can hold commonly used building models. Initially, they are all empty. By clicking on the first empty slot, the “Item Catalog” will automatically open. This is the primary resource for finding pre-defined building models.
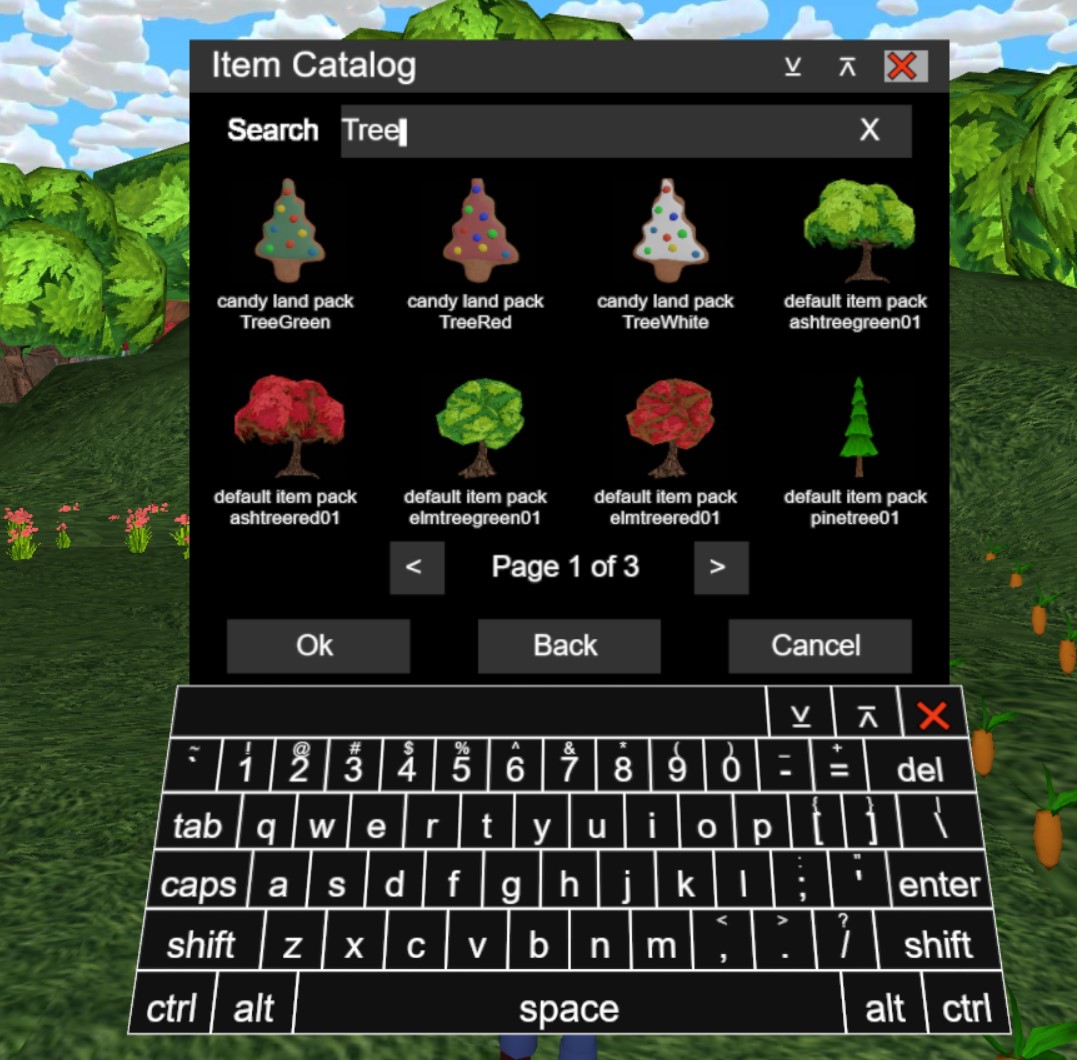
By using the search box and typing “tree,” the list will be filtered to show all tree models in the catalog. Clicking on the desired tree will add it to the selected “model palette” slot and set it as the current “build mode” tool.
As the pointer moves, a preview of the model will be shown. A spot can be selected, and the model can be placed by pressing the select button. This process is similar to drawing in a paint application, but in 3D!
“Floor,” “wall,” “door,” and “roof” models can be added to the other slots next. These can be used by quickly switching between them via the model buttons or corresponding keyboard numbers (0 to 9).
To exit “build mode,” click on the currently selected “model palette” item, which will switch back to “edit mode.”
To change the model in a “model palette” slot, double-clicking (or long-pressing on mobile) will reopen the “item catalog” for selecting a new model.
Editing Items in “Edit Mode”
In “edit mode,” an item can be selected and manipulated using three different tools, which are changed by clicking on the cube in the center of the tool. These tools are “move,” “scale,” and “rotate.”

Selecting the “move tool” allows items to be moved along the X, Y, and Z axes by dragging the corresponding arrows. Nudging the item along any axis can be done by clicking on the axis. The center cube can be dragged to move the item more naturally.
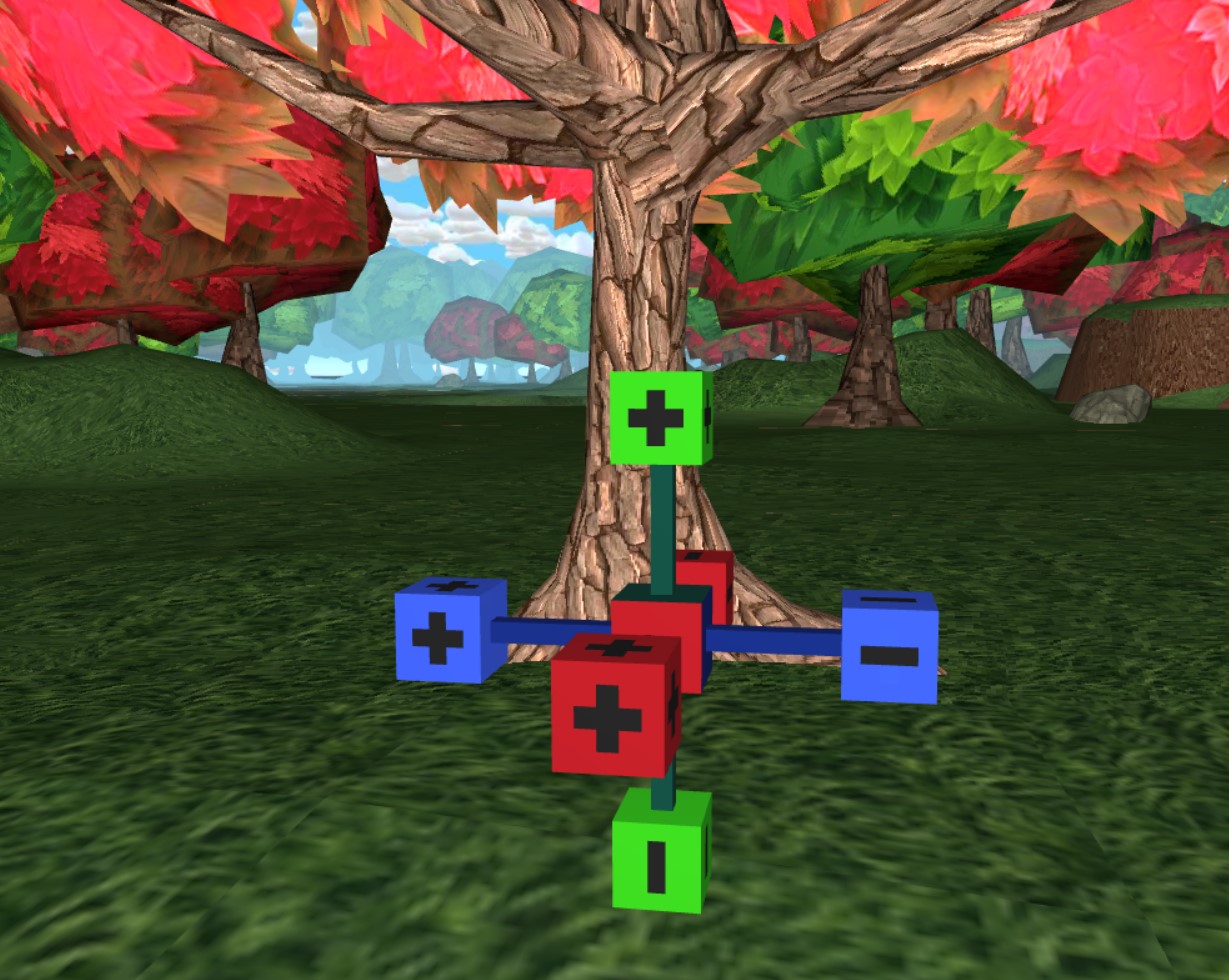
Single-clicking the “edit tool” center cube switches to “scale mode.” Scaling is done by dragging the endpoints along the X, Y, and Z axes. Nudging the item’s size along any axis can be done by clicking on the axis, with “+” to increase and “-” to decrease the size. The center cube can be dragged to resize the item naturally.
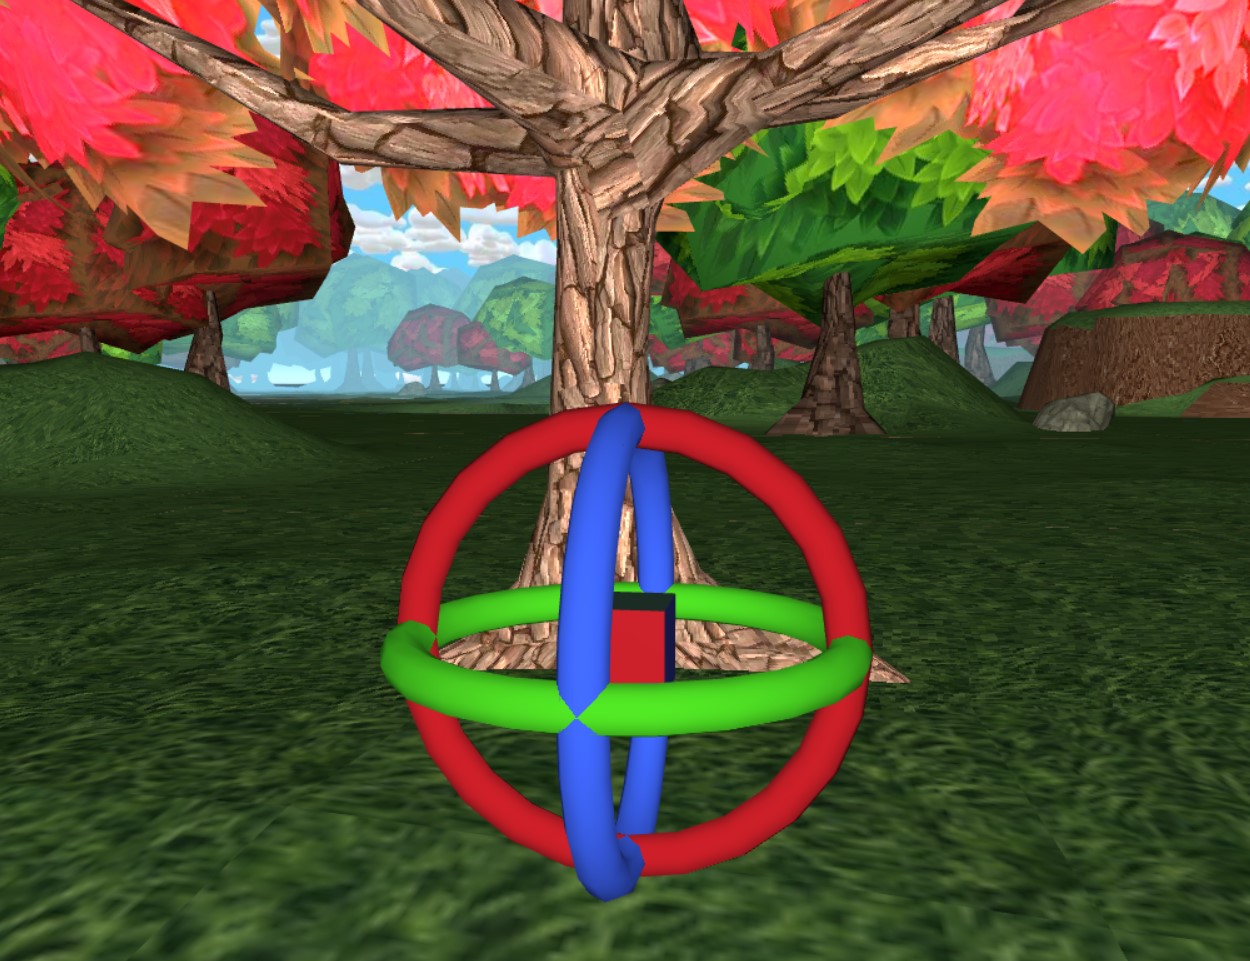
Single-clicking the “edit tool” center cube again switches to “rotate mode.” Rotation is done by dragging the corresponding rings around the X, Y, and Z axes. Nudging the item’s rotation by 45-degree increments is done by clicking on the ring.
The “scale” and “rotation” of an item can be reset by holding the “alt” key and single-clicking the center selection cube.
Removing Items
To remove something, the “model palette” button should be clicked again to turn it off. The item can then be selected, and the trash can icon pressed to remove it. Any changes can be undone by pressing the “reverse arrow” undo button in the “build bar” or using “control Z” on the keyboard.
Editing with the Grid On
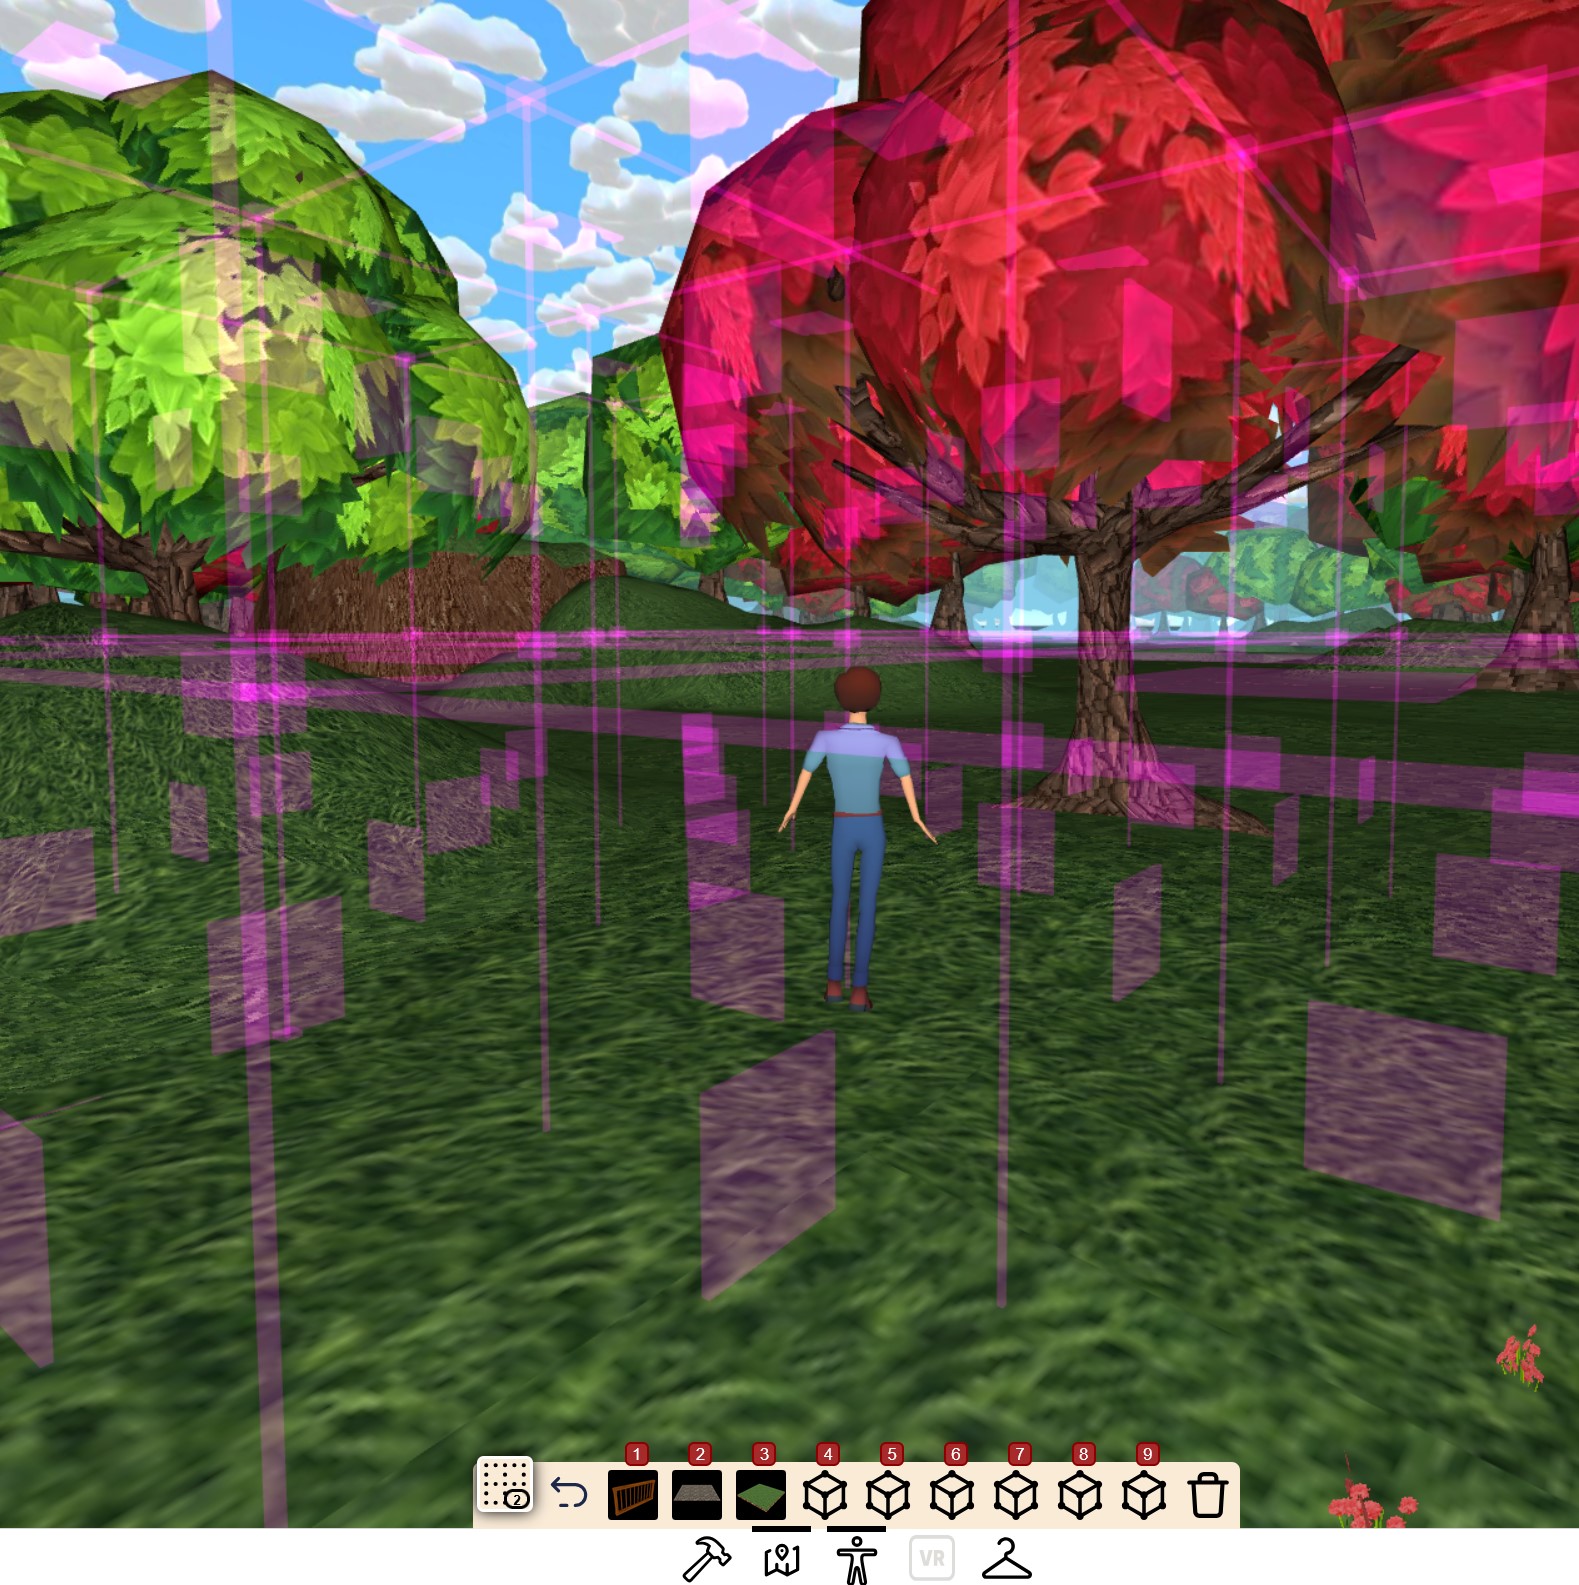
The “dotted square” button on the “build bar” is the “snapping grid.” This building option simplifies creating houses with floors, walls, or ground tiles by aligning the items. When activated, the grid helps position objects in 1, 2, 4, 10, and 20-meter grid spacing. The grid button can be pressed multiple times to cycle through these spacings.
Building houses without the grid can make aligning floors and walls difficult, often requiring constant switching to “edit mode” to adjust positions or rotations. The grid resolves this issue and makes alignment effortless.
Select the appropriate grid size when building (usually 4 meters). Positioning items over the grid squares ensures they snap into place and rotate correctly.
Place the pointer over the squares on the grid walls, floor and ceilings to align the model with that grid face.
By default, the grid is aligned with world coordinates (north, south, east, west). A useful feature allows the grid to align with an item’s coordinates. For example, when creating a building at an angle, turn off the grid, place a floor tile, and position it as needed. Reactivating the grid with the tile selected aligns it to the item, simplifying the placement of new floors, walls, and roof items.
Conclusion
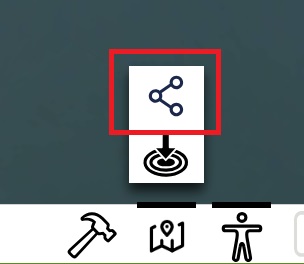
When you create something amazing and want to share it with a friend or on social media, you can easily find a location link using the “location share” button. This will generate a URL that you can share, allowing people to join you right where you’re building.
You now have all the knowledge you need to start creating.
Don’t forget that you can also explore the experiences you’ve created in Virtual Reality using a WebXR VR compatible headset. It’s super easy and heaps of fun! I’ll be adding building in VR very soon.
I hope you enjoy the latest update, and I can’t wait to see what you create with and hear your feedback.
See you in the metaverse, VR Me Up!